
Build a Sports Trivia Web App from Scratch part 2: An Introduction to React JS
Build a Sports Trivia Web App from Scratch part 2: An Introduction to React JS
Frontend Development have changed a lot in the past 3 years. Even thou I don’t want to get into the framework wars and comparison of which…


Frontend Development have changed a lot in the past 3 years. Even thou I don’t want to get into the framework wars and comparison of which is the best, I have tried my hands on Vue and Angular and they are both unique in their own ways and been used by top organisations. I started my journey into React about a year ago after working with Vue JS and it amazing how quickly you can put a UI together with Vue JS. In time I started to realised my lack of depth of the JavaScript language itself. I step back to learn JavaScript in more detail then I discovered React.
React A JavaScript library for building user interfaces
My pitch for React for the purpose of this tutorial and for beginners reading this is, it a library that allow you become a better JavaScript programmer. You will be writing mostly Javascript so it easy to apply what you learn to your React Application and grow quickly with the use of the language.
Since this is the build up to my previous blog (Single page Web Sports Trivia App with JavaScript, HTML & CSS — part one) try and check it out where we created the Web UI using pure JavaScript and CSS. It demonstrate how we can pragmatically create web element with JavaScript. I also add links to resources that can help you get started with JavaScript and the DOM.
And also we are not going to be talking in depth about styling I have some other post that cover styling with links to other resources that will help you. And I will also assume you have some basic background of JavaScript especially ES6.
So let’s dive in. Either building a small app or a big enterprise level application I believe the planning and having a process in place will go a long way to help you achieve great success. You can start with a sketch on paper which give you a lot of flexibility to experiment, then you can transfer tour sketch to a low fidelity mockup you don’t have to be an expert designer to do this there are free online tools that can help you achieve this. The idea is to help you understand different section of your app and give you a mental picture of how you can break them down into different component. I recommend you checkout Thinking in React.
Component
Everything in React is a component, you might have heard about this before according to the react official website:
Components let you split the UI into independent, reusable pieces, and think about each piece in isolation. This page provides an introduction to the idea of components.
When you sketch your UI and design a mockup it helps you visually break your app into a compossible component. That’s exactly what I did bellow.
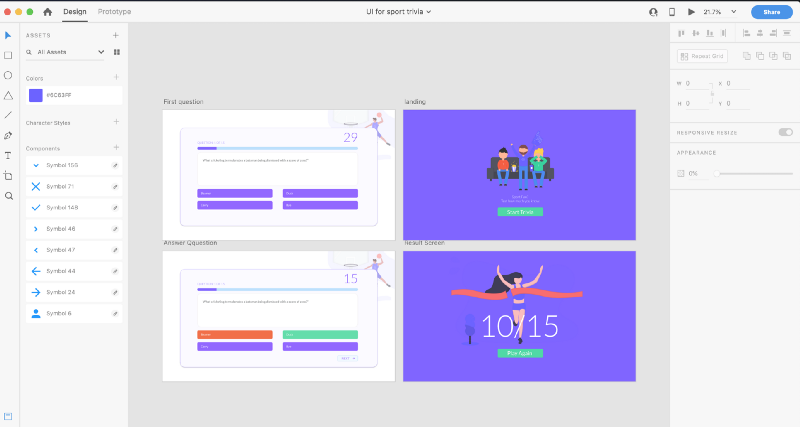
Here I use Adobe XD it a free UI design tool from Adobe, you can use any tool at your disposal, even keynote or powerpoint can get you started.
JSX
Before we continue another important thing to be aware of is JSX.
const element = <h1>Hello, world!</h1>;JSX is a syntax extension to JavaScript that allow you include HTML tags in JavaScript.
const name = 'Ope Junior';
const element = <h1>Hello, {name}</h1>;

ReactDOM.render(
  element,
  document.getElementById('root')
);
The above code is a simple React UI we declare a variable called name and create an h1 element where it interpolate the name variable using the curly bracket any variable can be render. {3 + 4} any JavaScript Expression in the curly braces will be evaluated by React. ReactDOM.render is the way React render your UI for you. And now you are a React expert :) yea that’s the whole concept of React but as our application get more complex we need a better way to manage all the moving part and React have just the thing to get us started quickly. We will be using Create React APP to help us generate a React App with most part setup for us.
Installation
To setup our development environment you need to install Node JS it is available for any operating system. You will also need to Install Visual Studio Code you don’t need to I just think it is one of the best free editor out there.
Node comes with NPM preinstall that’s the package manager we will be using to manage our dependencies. You should also install YARN available for various operating system.
npx create-react-app my-app
cd my-app
npm start
Compiled successfully!You can now view sample in the browser.Local: http://localhost:3001/
On Your Network: http://10.218.6.66:3001/Note that the development build is not optimized.
To create a production build, use yarn build.If you’ve previously installed
create-react-appglobally vianpm install -g create-react-app, we recommend you uninstall the package usingnpm uninstall -g create-react-appto ensure thatnpxalways uses the latest version.
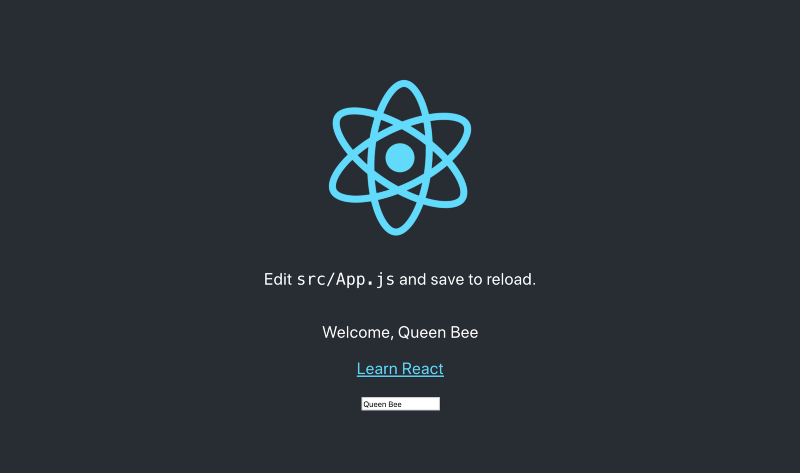
after running npm start your app should start at the specified localhost when you ctrl or cmd click it open up in the browser or it will auto load in browser.
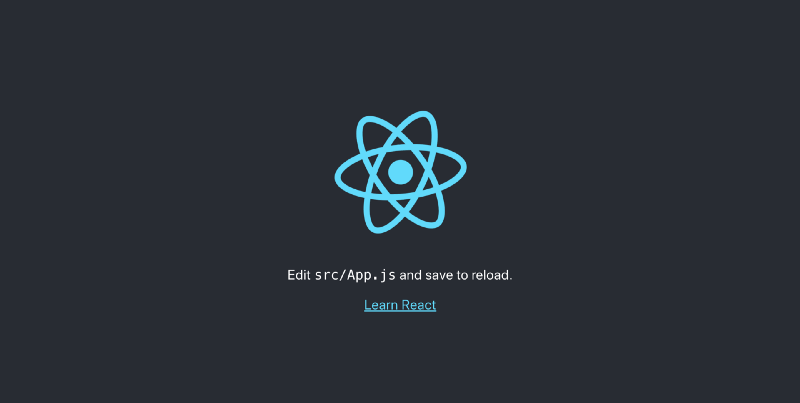
And there is your first React App. Most of our work will be in the src folder you will see the App.js that is waht is rendering on the home page now.

This is a simple functional component that render an SVG a text and link. A React functional component is just like a normal JavaScript component that return and HTML elements. You can see the import at the top of the code where we import react logo and css into our component. You declare a functional component like you will any JavaScript function and then export the function at the end to make it available to React to use in rendering our page. Another important thing you should notice is that when appying a class to JSX you use className="btn-large" instead of the normal class = "btn-large"
So how does React know about our App.js component.
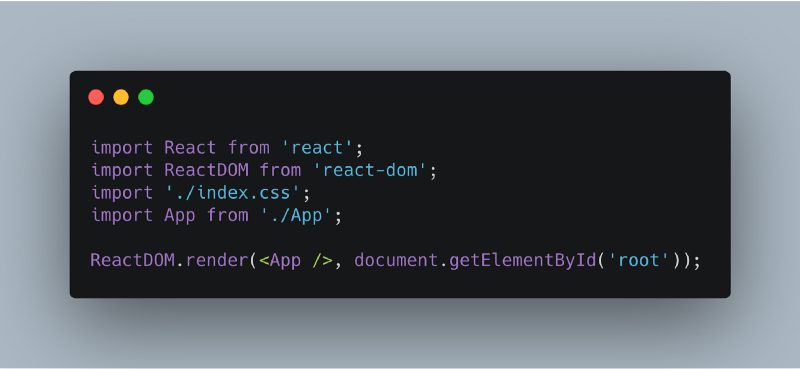
Remember the ReactDOM.render I talked about above, that is exactly what is happening here. Not we export our App.js component then open the index.js in the same src folder and voila that’s where we import the App and then pass it as a component to be render in the browser within a div with the ID of root where can we locate the root element, open the public folder at the op of src then you will find index.html in the body section you will find a div with an ID of root. That’s where React insert our Created HTML. So we don’t need to be doing elementCreate and transverse the DOM ourselves React handle that for us.
Class Component
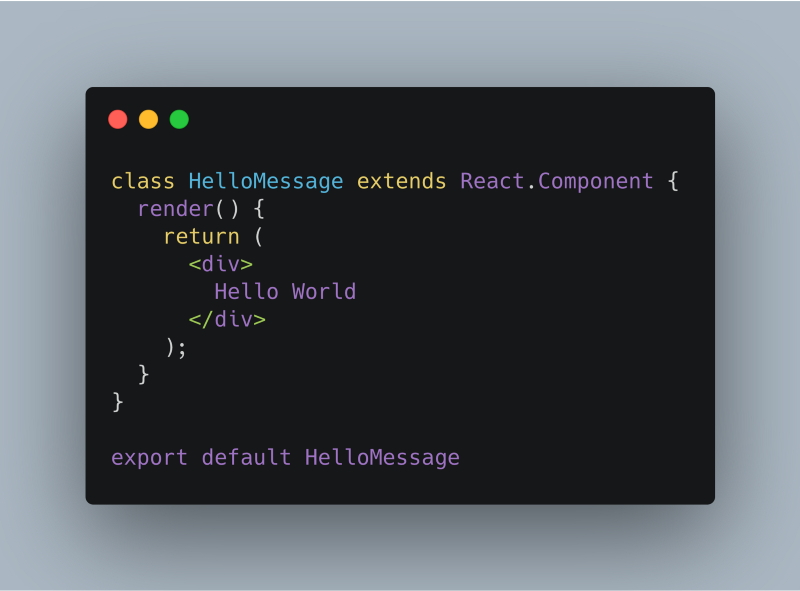
We have seen a sample of functional component above is an example of class Components before there use to be reason why you will choose one above another but with the recent update to React functional component can now do most things that are exclusive to class base components. But we are not going into those complexity. The goal of this tutorial is to introduce you to React so you can continue to learn more easily.
Props
Conceptually, components are like JavaScript functions. They accept arbitrary inputs (called “props”) and return React elements describing what should appear on the screen. — React Documentation
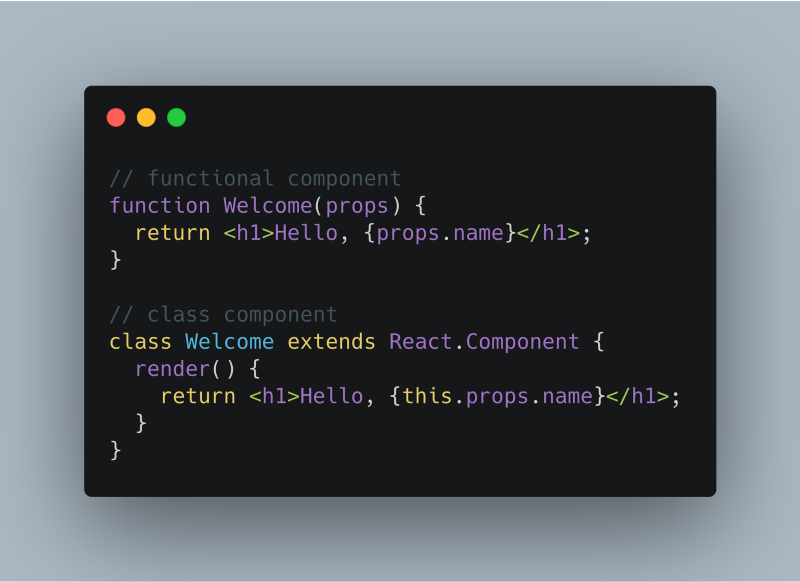
As you can see from above both Function and Class based Components can get props, what you should take not of here is the use of this.props in the class component and you will be fine.
Currently the default Component that comes with the React installation doesn’t have any props but before we move forward we care going to create a new component that greet a user and we will have it bellow the text on our page.
Create a new Component called Welcome.js
import React from 'react'export default function Welcome(props) {
return (
<div>
<p>Welcome, {props.name}</p>
</div>
)}Some common pattern you will see is both function declaration and export on the same line. Now head to the app.js and import the Welcom Component
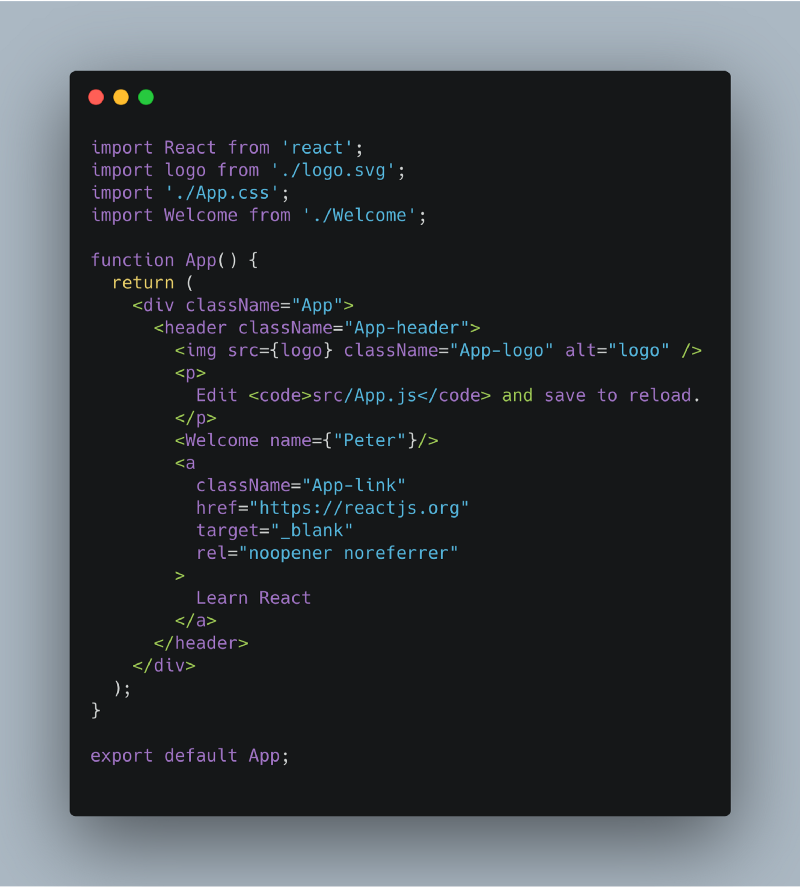
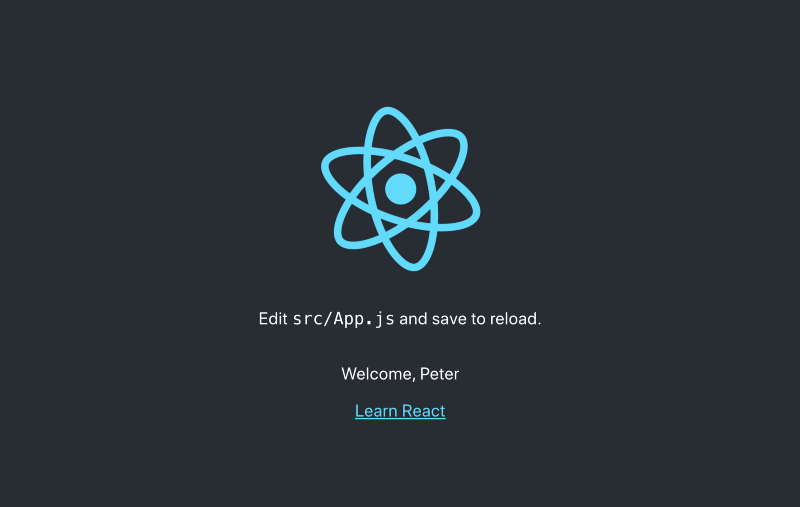
You can see our component rendered with Peter pass into it. That is how component are composed and props pass, you can read more about Props and Components on React Doc.
Like the saying a UI is the function of it state. When we perform an action in our app React Render or Re-Render our App to show up the new state.
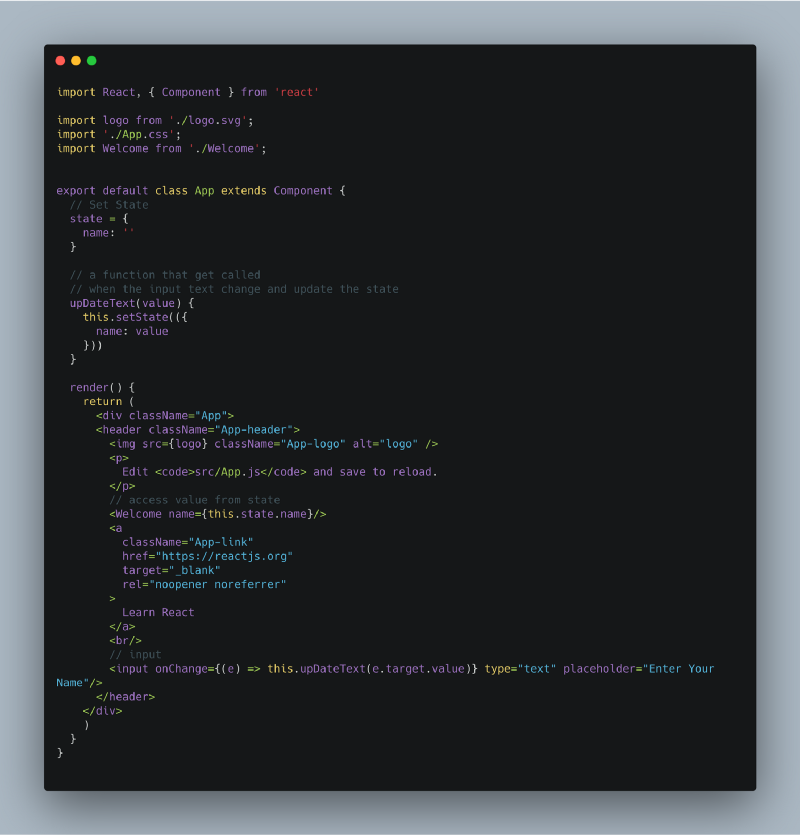
Now using State we can update name in realtime getting the value from the text input.
Awesome we have cover a lot trying to go through the fundamentals of React. We all we need to know to start working on our Sport Trivia.
What we will be building:

Here is the complete code on Github and here is the online version if you want to try it out.
For navigating from one page to another we are going to be using React Router DOM continue from the app you created let change the content of the App.js with the content bellow. Try and type the content and ignore the comment. Typing help you read the code and it more effective than copy and pasting code.
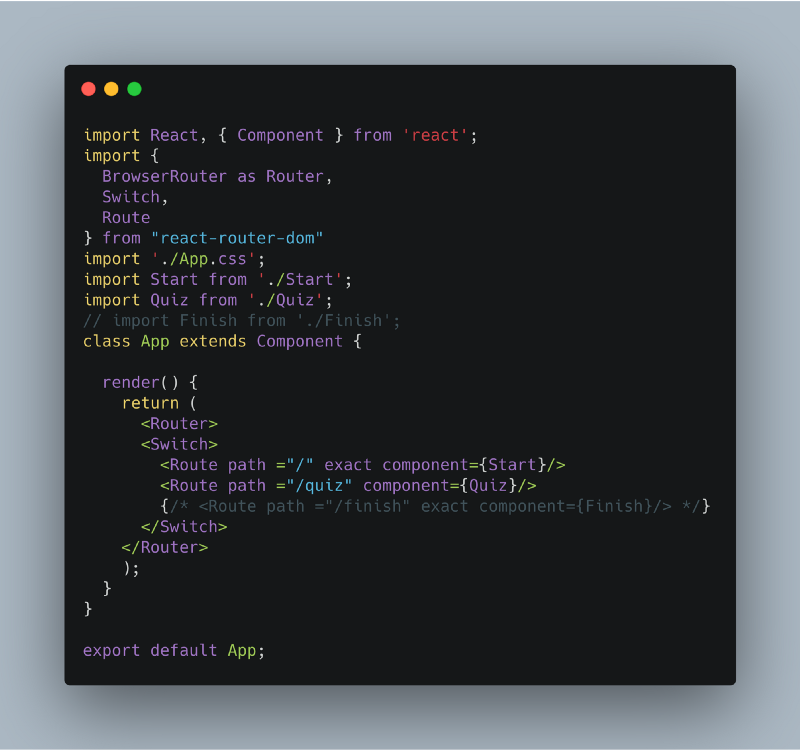
to install React Router DOM just do npm install react-router-dom then we can import some methods from it in the App.js we have two routes '/' and '/quiz' loading Start and Quiz.
Start Component
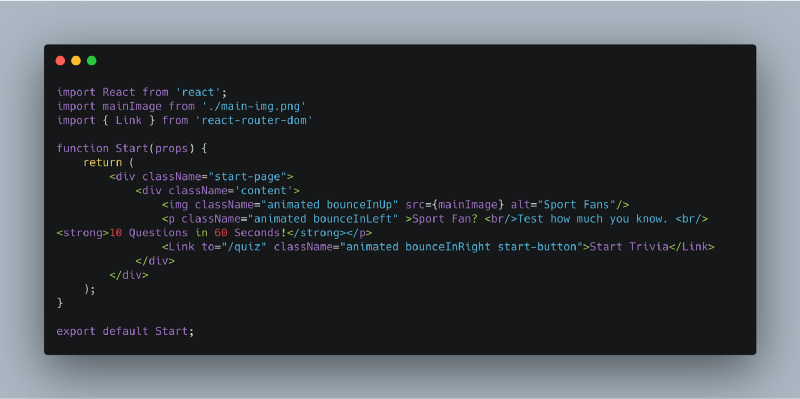
This is the landing page of the Quiz App you will need to create Start.js
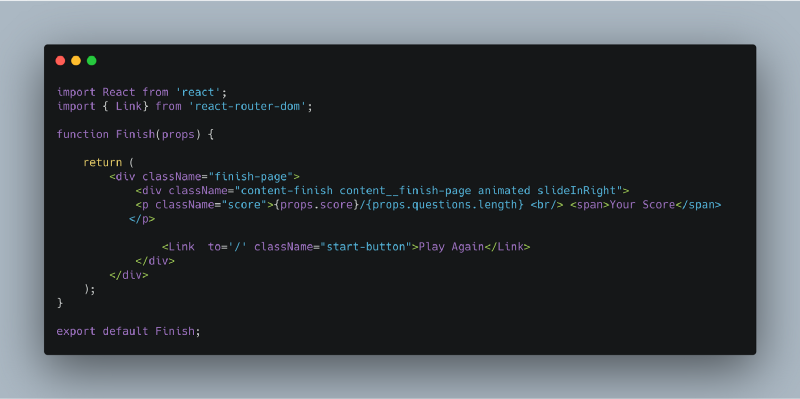
Finish Component Finish.js
We also have a Questions.js that holds the arrays of our questions. We could have questions from an API but that will add more complexity for us as a beginner. Fetching data from and API is easy in React also, I will do another tutorial on that.
Quiz Component Quiz.js
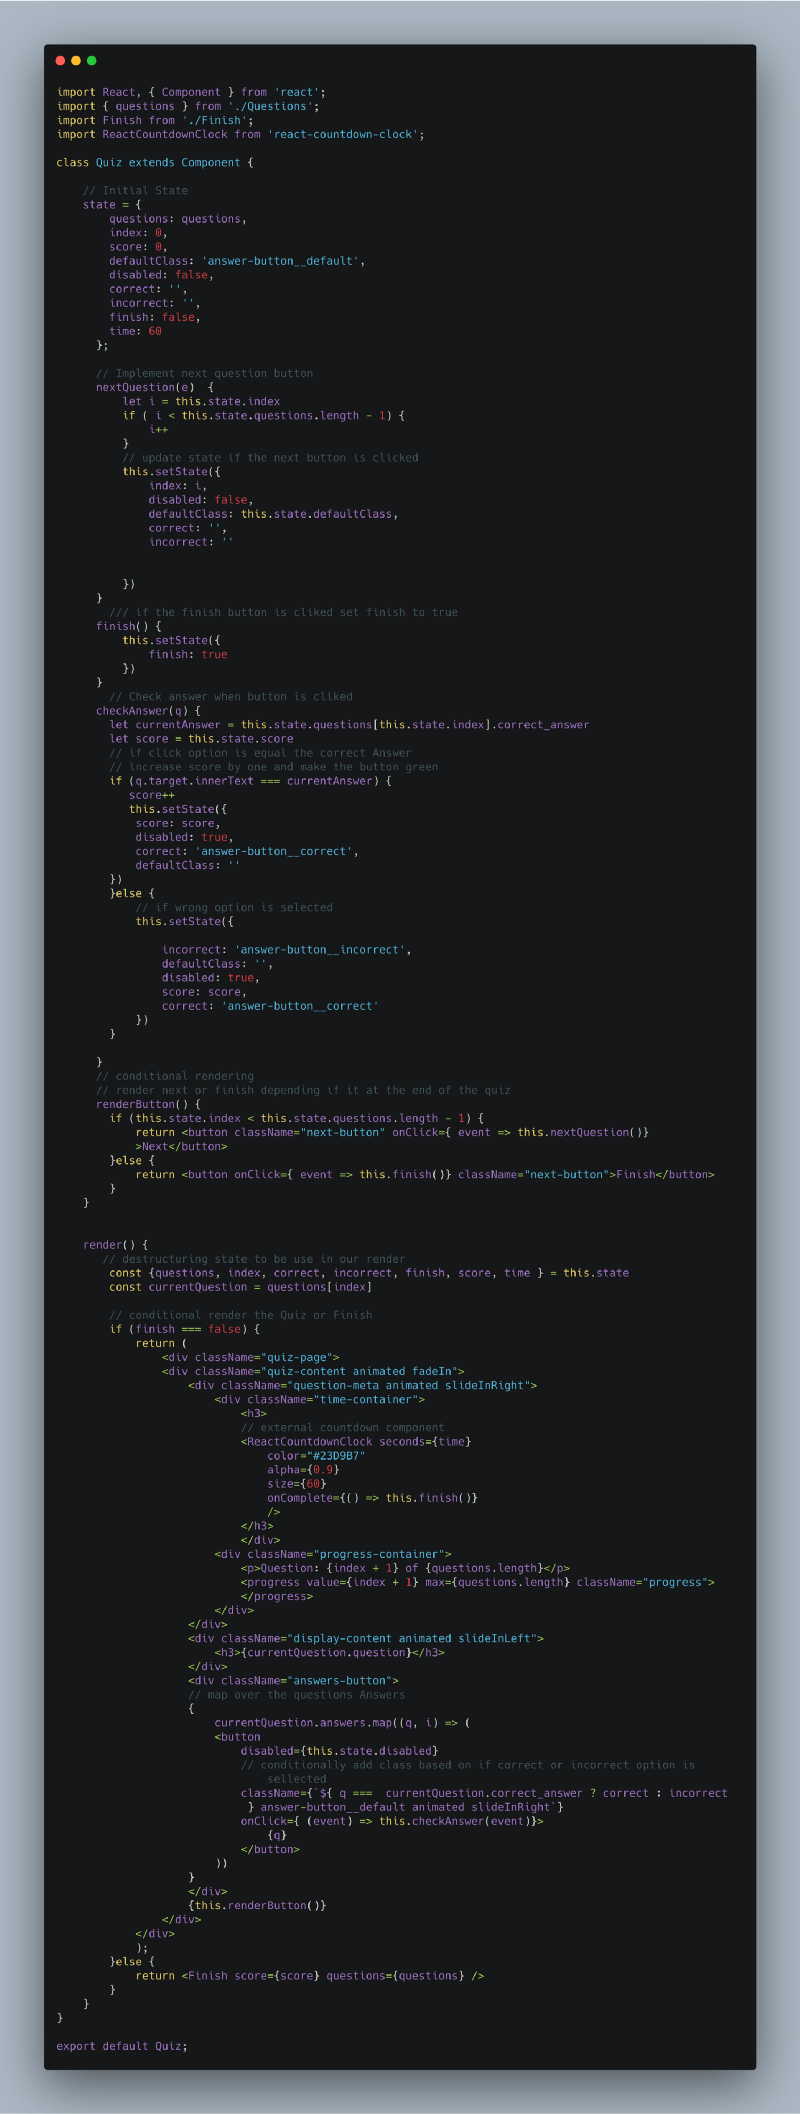
This Quiz component is a lot, but it’s basically everything I have explained to us with examples above. And you can see it all JavaScript, we are using if else statement to conditionally render component, .map to map over array of question options to dynamically render the options buttons.
As you can see for the Finish Component we import it into Quiz and pass it props it needed to display the final score and we need the questions to get how many questions we are presented.
Then for the countdown we used an external component, this is to demonstrate that we can use other people’s Components in our own code. We are going to use React Count Down to install it just run `npm i react-countdown-clock` Checkout the documentation to see different kind of props you can pass to the React Count Down Component.
Finally you can also add external CSS, or Fonts to the index.html file in the public folder. For instance for the simple animation on the site I used an amazing CSS library call Animate CSS
<link rel="stylesheet" href="https://cdnjs.cloudflare.com/ajax/libs/animate.css/3.7.2/animate.min.css">Add that to the index.html head tag and Animate CSS is ready to use.
:)